Bildhive - Using Zoom Integration
Bildhive CRM has an appointments feature. An appointment can be virtually scheduled, for which we are provided multiple options a user can choose to use.
Zoom is one of the conferencing options within Bildhive. Though Zoom is only providing conferencing possibilities and does not have calendar and mail functionality, we are depending on other integrations like Google, Outlook and Microsoft Office 365.
The above services provide the mail and calendar functionality, so that bildhive can create events on behalf of the user on one of the configured services. And those calendar events will have the link for the meeting that is created using the Zoom integration.
Prerequisites
For using Zoom for conferencing, a user first needs to authenticate with Google, Outlook or Microsoft Office 365. That is necessary because when appointments are created within Bildhive they are synchronized to the users calendars as well.
Authentication (2 Steps)
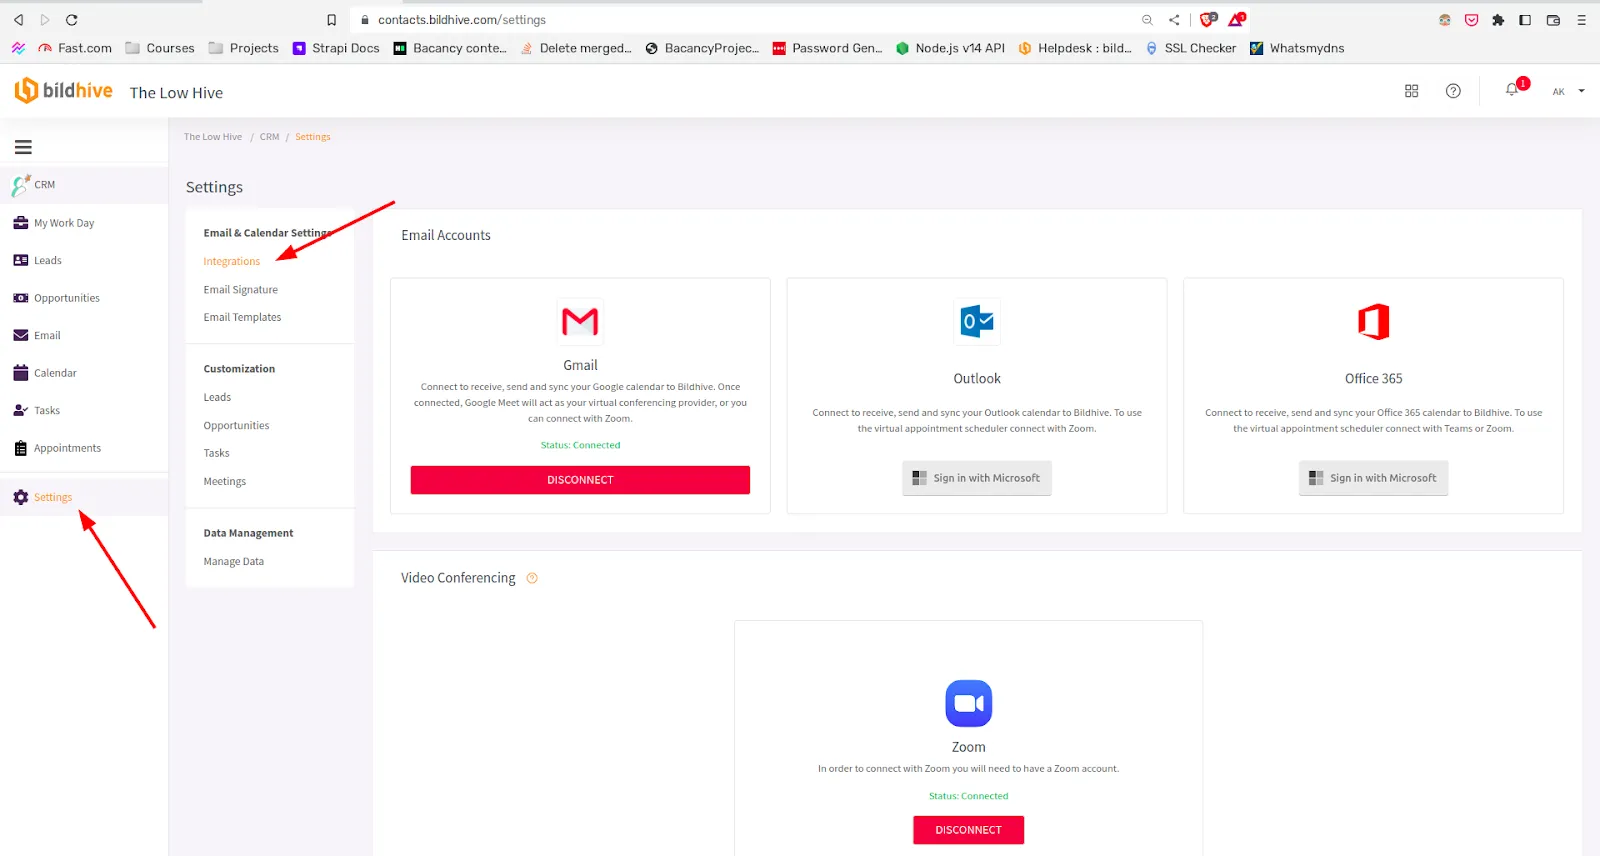
Step 1:
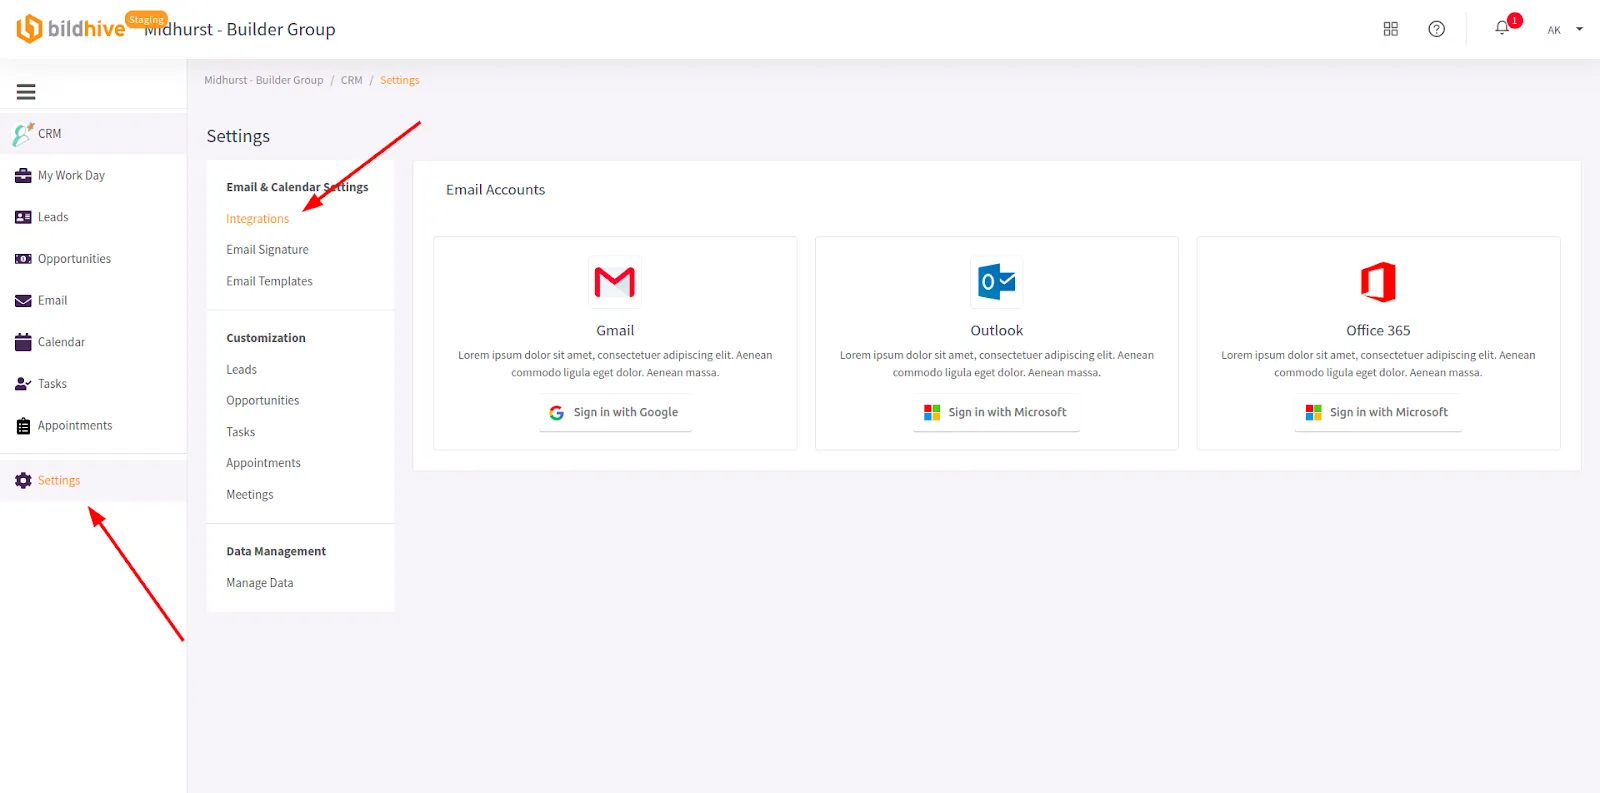
From within the CRM application a user can go to the
settings -> integrations and can authenticate with any
of the three services. (See image below)
Note: If
the user has already authenticated any of these service,
this step can be skipped.
Step 2:
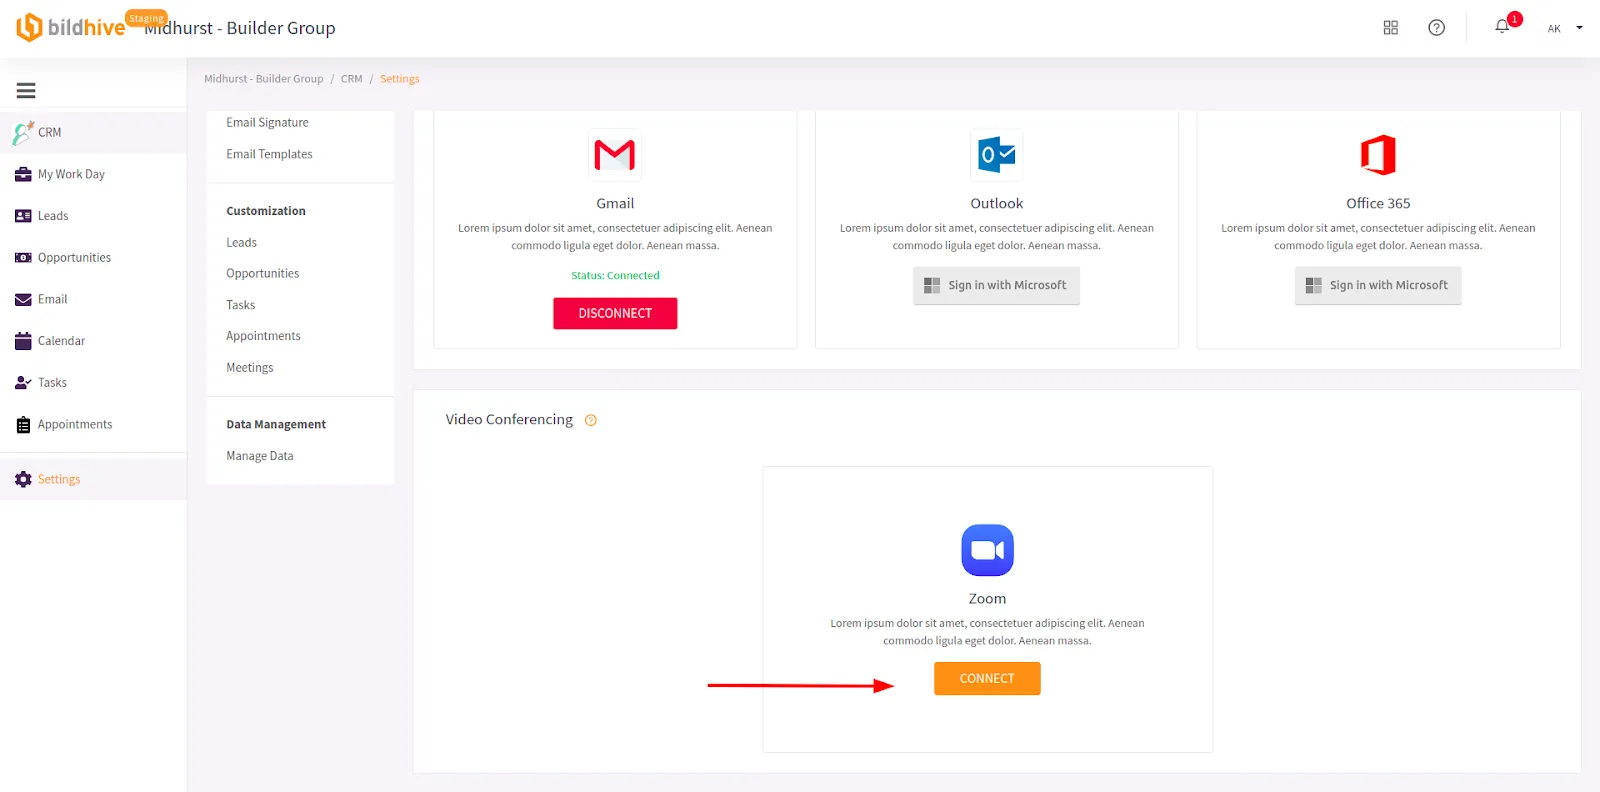
Once a user has authenticated with any of these services, there will be an option to connect the Zoom account just below the “Email accounts” section. (See image below)
That is it! Now whenever a new virtual appointment is created and assigned to this user or if any customer books a meeting using the website widget, a new calendar event with the chosen service will be created and it will have the link for the meeting that is created using their Zoom account.
Usage
The zoom conferencing is used behind the scenes in the appointments feature on the CRM application of Bildhive platform. To leverage the Zoom conferencing we can take a look at the process for creating an appointment.
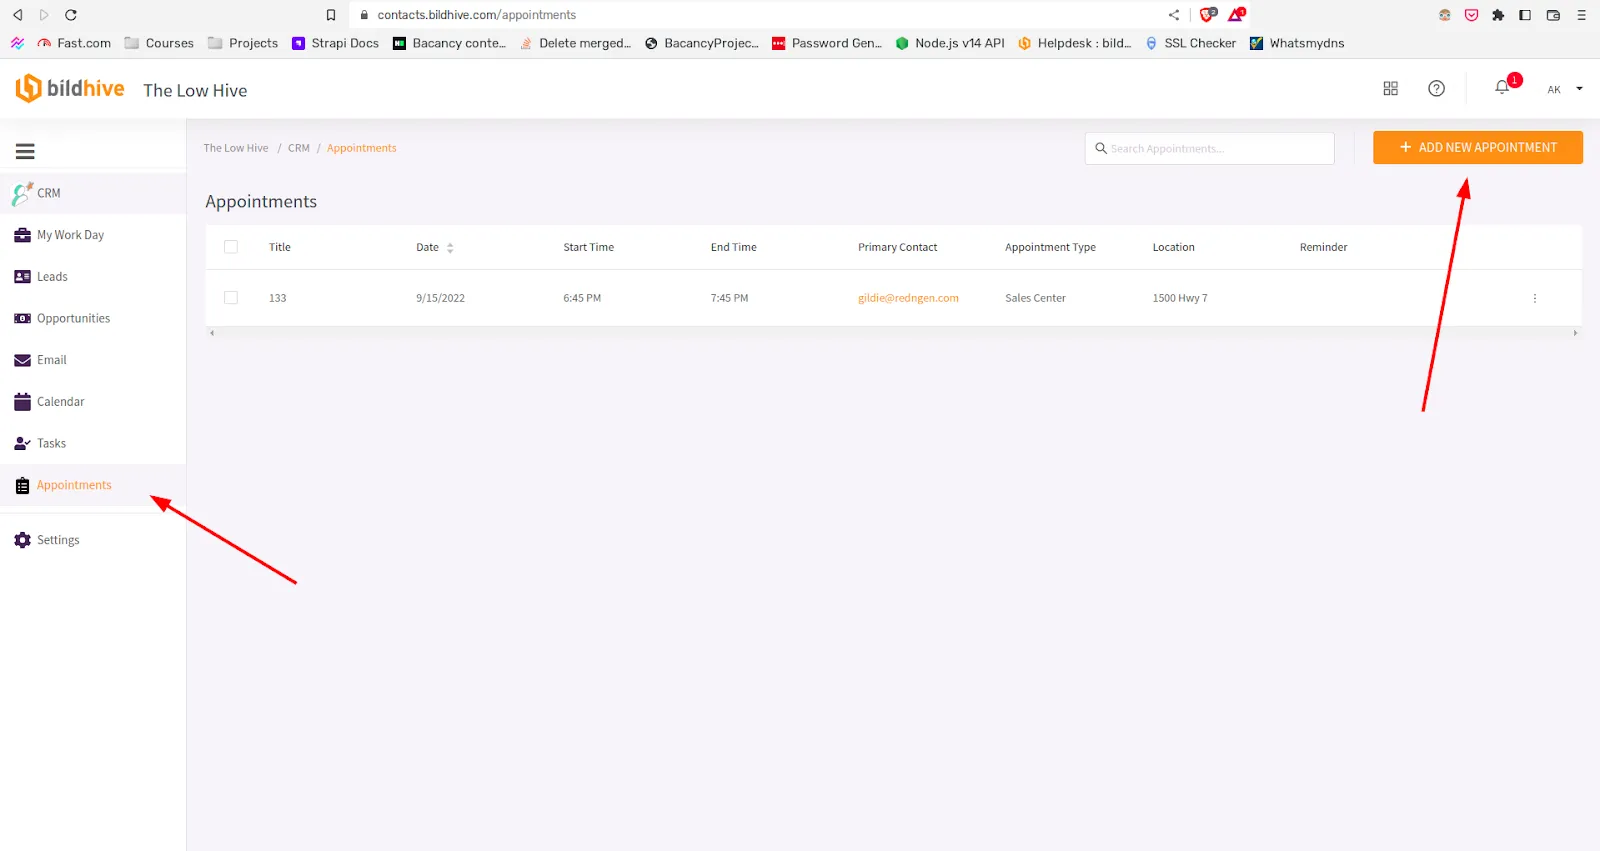
Let’s go to the appointments page and click on the Add new appointment button.
Fill up the details for the appointment, the primary contact is a lead and assign to is the sales rep, we can choose the current user and the meeting type should be virtual meeting.
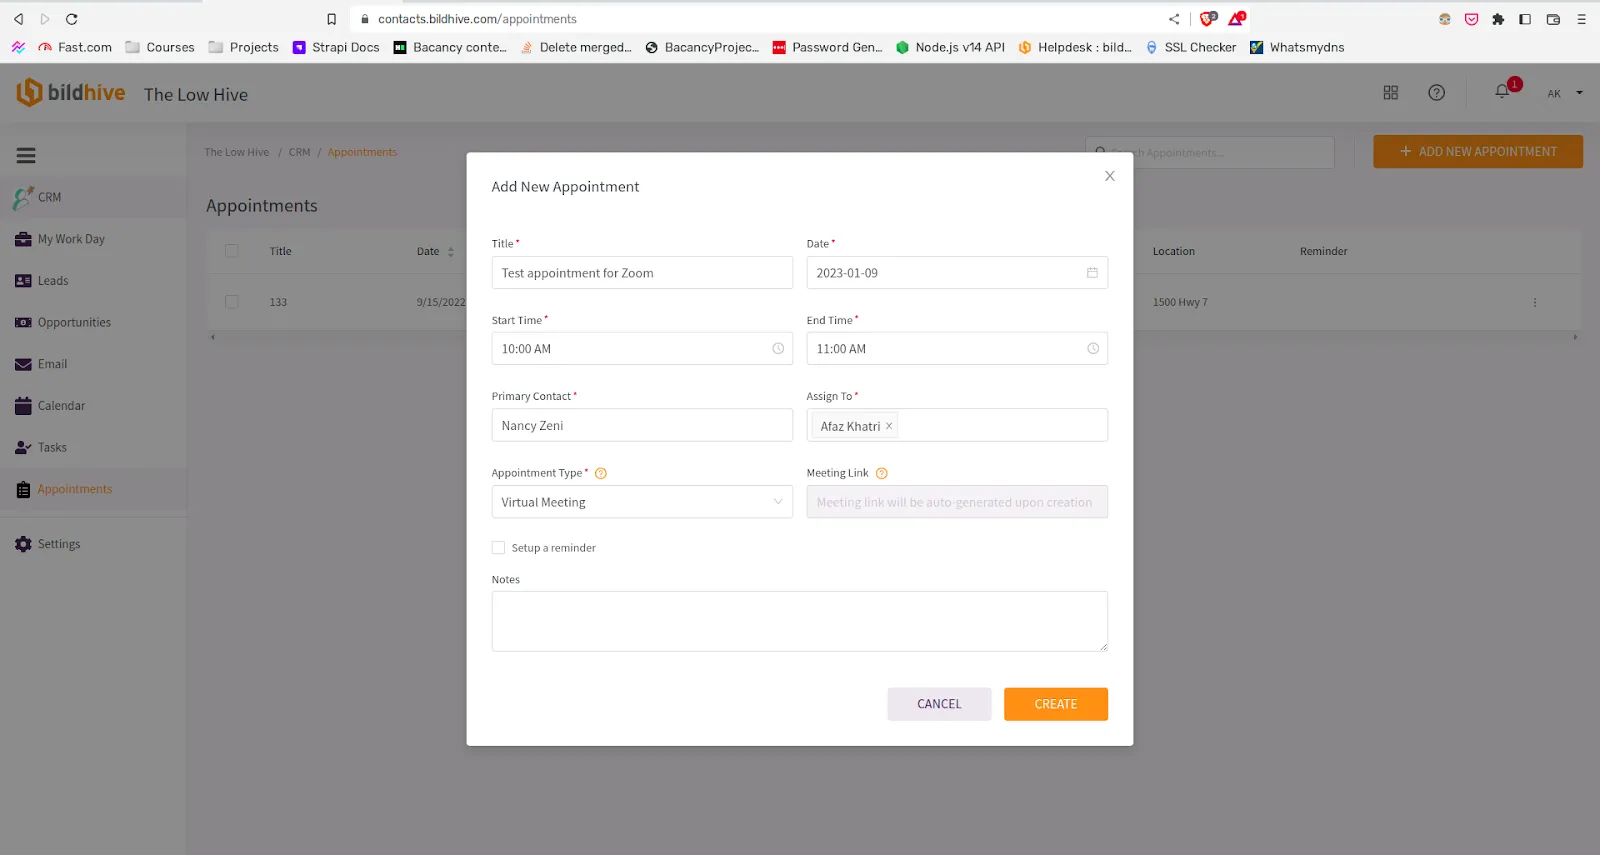
Click on “Create” to create an appointment, it will also generate a Zoom meeting and add the meeting details to the appointment. So when the appointment is created, the Zoom meeting is generated on behalf of the assigned user and the lead is invited to the meeting.
If the appointment is updated with a different time, then the Zoom meeting will also be updated. If the appointment is deleted, the Zoom meeting will also be deleted.
Removing the App
If you wish to discontinue using the Zoom conferencing, you can remove the authorization of Zoom from the CRM.
Go to settings of the CRM, and go to the integrations.
Under the “Video Conferencing” heading, you can see the Zoom is connected. You can click “Disconnect” to remove the Zoom application from the Bildhive platform. Once that is done, the appointments will no longer use the Zoom as a conferencing provider for your account.
Removing app from Zoom marketplace.
Follow the steps below to remove Bildhive app authorization from Zoom:
- Login to your Zoom Account and navigate to the Zoom App Marketplace.
- Click Manage >> Added Apps or search for the "Bildhive" app.
- Click the "Bildhive" app.
- Click Remove.
